Monday 28 March 2011

Pocket tissue holder

Hi everyone sorry i have been AWOL for a week things have been hectic round here and are still a little that way. Last week i had an abscess which made me look like i had swallowed a tennis ball (not my best look!).  Not only did i look a mess it wiped me off my feet.  It was even more annoying as i had booked half the week off work to get some crafting done which just didn't happen!. On top of that we had new fitted units installed in our study which meant everything was everywhere (and some of it still is!) for most of the week. Then on Friday me and Mr G went to Manchester for the weekend to celebrate 20 years of being together.  We had a fab time and i wish we were still there.  here's a pic of us in one of the cocktail bars on Friday night...


Just before i go i'll show you the one thing i have made this week - a pocket tissue holder.  i used some cute fabric scraps i had in my sewing box.  I just love the bright bird fabric.  the inside is pink and white polka dots.
If you want to make one i used this tutorial which is so so easy so go one give it a whirl.


Whimsy Couture


lil luna link party button

lil luna link party button

Friday 18 March 2011

Phone Case Tutorial


Ok guys as promised i have done a tutorial for the phone case i made earlier in the week.  Its really easy to do and only takes half an hour (not even that if you are an advanced sewer which i'm not!).  So are you ready... Here goes and if i have missed anything out or my instructions aren't clear give me a shout...

Phone Case tutorial

Materials needed:-

1 x piece of outer fabric 11 1/2" x 4 1/2" 
1 x piece of lining fabric 11 1/2" x 4 1/2"
2 x pieces of iron on interfacing (medium weight) 11 1/2" x 4 1/2"
1 x lobster key fob (its probably not called that at all but look at my pic to see what i mean!). I got mine from John Lewis a pack of 2 for £1.50 but you can get them on ebay cheaper.
1 x scrap of ribbon
1 x button
1 x hair bobble or elastic
thread scissors etc etc...

Ok Ready to rumble

Step 1
Iron a piece of interfacing onto the back of your outer fabric and a piece onto the back of your lining piece.

Step 2
Place your lining piece flat down with interfacing on the bottom and right side facing up.  Now take your ribbon and thread it through the bottom hoop of your key fob. Pin your ribbon (and attached key fob) approx 2" down from the top of your long side of the fabric on the left hand side.  Make sure the ribbon edges are pointing to the fabric edge and the key fob is somewhere in the centre of the fabric piece.  See pic

Step 3
Take your piece of elastic or hair bobble and pin it in the centre of the short top edge of the fabric (see pic above).  You need to make a U shape loop which should face inwards towards the centre of the fabric (like the keyfob is). See Pic above.

Step 4
Now place your main fabric piece on top with the right side face down on top. This means you will now have the interfaced side on top.  See pic below.

Step 5
Ok nearly done now.  Sew around the edge of the rectangle leaving a gap for turning out on the right and side (about 2").  Clip your corners and turn the right way out through the gap.

Step 6
Now iron flat and then lay your outer fabric face down and bring the bottom short end up to where your keyfob ribbon piece is (see pic) and pin.


Step 7

Stitch right round the rectangle keeping close to the edge making sure you catch the gap that was left (which should already be tucked in neatly ).  I do two rows of stitching as i think it looks better and is more sturdy but you don't have to its up to you. Of course my machine would decide to start playing up today and for some reason has done some irregular stitches (anyone know why please tell me?)

Step 8

Now bend down your top flap and sew the button on the front piece where you want it.  You can sew the button on before making the piece into a pocket which is probably easier but i don't as i want to be able to put my object/ phone /camera etc in and then see where it needs to go. It means i don't have to worry that the button is in the wrong place once its all sewn together!.


That's it you are finished. Give yourself a clap and then pour a glass of wine (or is that just me?!).  The lip balm holder i made is done exactly the same way i just made it smaller. You can have a play around with different fabric pieces to make different size holders for things.  You can also do a Velcro fastening instead of hoop and button if you want. 


Let me know if this tutorial is easy to understand and if you make one please link back to me (and show me your fab holders).





Thursday 17 March 2011

Two Celebrations Today

Today is St Patricks Day and i have a lovely Irish Friend who i know will be celebrating long and hard however i have another reason to celebrate today.  20 years to the day me and Mr G first starting dating.  Given i'm only 36 i think this is quite an achievement.  Things haven't always been easy and we have had good and bad times but the good by far out way the bad.  Like everyone we have had to work on our relationship but it is one that has been worth working on.  He definately is my sole mate, my best friend and my husband all in one.  So heres to another fab 20 years MR G...

Ok now all the soppy stuff is over with i'll show the pump bag i have made for my Neice...
 I'm doing one each for all my neices for Easter.

Saturday 12 March 2011

3 gifts from fabric scraps

Today i am going to share with you 3 things i have made from some small pieces of fabric scraps.  Each project took less than half an hour and i have to say i'm quite pleased with how they turned out given i made two of them up...
First item is this phone holder which i made up as i went along.  It was really easy and if anyone is interested i may try and do a tutorial for it.
This owl fabric is one of my faves at the moment.

I used fusible interfacing on the back of the lining and the main fabric to give it a bit of stability and attached a key fob as i am always losing my phone so now i can attach the case inside my handbag.

The next two items i made using some Amy Butler scraps.  These are a present for Mr G's Auntie who goes nowhere without pocket tissues and a chapstick!!

For the tissue holder i followed a tutorial over on skiptomylou. If you haven't visited Cindy's site go and look straight away she has so many fab homemade gift idea's and tutorials.
This chapstick holder i made up as i went along using a similar process to the phone holder but i didn't use interfacing. These projects were so easy and only took scrapos and very little time so i'm probably going to make a bundle for pressies.  They would make good Mothers Day gifts for starters..
Tip Junkie handmade projects
Pink Hippo Party

Thursday 10 March 2011

Hoppy Easter!!

This is a quick post as i am supposed to be decluttering today (yeah that really isn't going that well!).  Thought i'd just share a couple of Easter projects i made earlier.

This first one is a set of Easter stamping pens which i thought is a nice alternative to the mounds of Chocolate kids get every year.  I have used a bunny sticker from a pack i got in poundland and cut the letters using my Cricut but you can use stickers or write the message on. The stripey card is from a Dovecraft Christmas selection.

This next one has 5 mini rabbit choccies on (which i got from Tesco) and i have again used a poundland sticker.  If you haven't seen these packs get yourself down to a pound shop.  they are really cute and you get quite a lot in the pack for £1.  The letters are cut using the hello kitty cartridge on my Cricut and i have gone round the centre of the letters with a gel pen.

Ok now i off to declutter (or maybe finish cutting the hexagons i need to send to Pootleflump :-))

Monday 7 March 2011

Easy Glass Etched gift

Todays post is about a project i have been meaning to try for ages. Last year i bought a tub of glass etching cream off ebay and it has been sat in my study waiting to be used. Last week i finally got round to trying it out. Its my hubby's aunties birthday next monbth and she has a very sweet tooth. i thought it would be nice to make her a personalised glass sweet jar full of sweets. Here's how it turned out.. The etched name doesn't turn out as clear on the camera but it is lot more prominant on the actual jar.

If you want to make one you need any glass jar, some etching cream(I used amour etch) and stickers and sellotape.  if you want to add embeliishments after like i did you will need those too.

Step one apply the stickers that spell the name(or word) you want to etch in the centre of of the glass and then using sticky tape tape a rectangle border around the letters.  Make sure they are all stuck down securely. Yes this is a different glass jar as i forgot to take photo's whilst i was etching the one for Lynda!


Apply the etching cream using a paintbrush and leave for atleast half an hour.  Make sure you apply a thick coat like above (or it doesn't etch fully).  Wash off the cream and remove the stickers and sellotape to reveal the name etched in the centre (tecnhically its the rectangle around the name that is etched but you know what i mean!!).  I embellished mine further with ribbon and paper flowers and hearts.
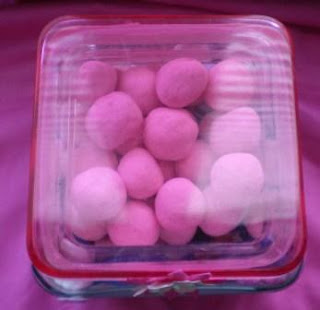
Now can i resist those yummy bon bons?Probably not so i had better wrap it now before i'm tempted to dip into it!!

Friday 4 March 2011

Easter Chick tin can

So i'm starting to get slightly obssessed now!  After making the easter bunny tin can (florence) i decided it needed a friend so i made an Easter chick tin can(Morris) to keep it company.
 When i showed it Mr G he laughed and said it looked like Lili had made it! My response was good because they are going to be gifts off Lili anyway...
Iron Violet Designs

Wednesday 2 March 2011

Easter bunny tin can

After doing my first Easter project yesterday I have got the bug. Now I know its Mothers Day before Easter and I will get on to posting some gift ideas for that but for now its all about Easter. Over the last week I have seen a few Easter projects that have involved making a rabbit out of a toilet roll tube and that got me thinking… You know how I have a bit of an obsession with tin cans well I thought an Easter bunny gift can made using an empty tin might be quite sweet. Here’s how it turned out…


Here ‘s how to make one.


1. Cut a piece of scrapbook paper to fit round your tin. You can use a piece of string or tape measure to measure round the top of the tin and a ruler to measure the length.


2. Using double sided sticky tape stick the paper round the tin.


3. Fold a piece of the same paper in half and cut out a long ear shape. Unfold and you will have two ears the same.


4. Do the same with a white sheet of paper and cut a small ear shape. Stick the white inner ears on top of the larger ears.


5. Stick ears on top of the tin


6. Using yellow card or paper cut out the cheeks shape (see mine) and then draw 3 black lines on each side for whiskers


7. cut out a triangular nose from scraps and 2 long white teeth. Stick these to the cheeks


8. Glue centre of cheeks onto tin can and then draw two black circles as eyes


9. I then added 4 flowers as embellishments around the top but its up to you. You could add a bow or some ribbon or just leave it without any added embellishments.


10. Add tissue paper inside the tin and fill with sweets,chocolates etc.
Catch a Glimpse Button

Tuesday 1 March 2011

First Easter project

Lili has gone back to school this week after a week off for half term this means it is only about 6 weeks till Easter break so i thought i would start experimenting with some eatser gifts that are easy to make. Here is the first one. i am going to do a post on top 10 easy easter gifts at somepoint but for now this is all i have!!.


I got the mini chocolate eggs from Aldi (i think or may have been home bargains!) and cut the chick out using my create a critter cartridge in my Cricut.  I popped the eggs in a cello bag sealed it and then made a topper by folding a piece of pink dotty card in half, sticking a co-ordinating sheet of paper on,writing happy easter on that sheet and then adding my chick.

telephone stand revamp

I'm not really one for taking on big projects that take awhile as i like to be able to start and finish things in near enough one go without having to keep going back. So when i decided that the really old pine telephone stand in our hall needed a revamp i had obviously fooled myself in to thinking it wouldn't take long. A bit of a sand down and a couple of coats of paint right? - oh no soo wrong!!.  Try about 20 coats of paint and a lot of sanding and your a bit closer!.  Anyway it started out like this - urgggh...


 It was worth it in the end though.  Heres what it looks like now and you will have to ignore the wires.  We have an ongoing problem with our broadband connection and everytime you put the connection socket box cover back on it doesn't work.  Hopefully this week it will be fixed and all the cables will be tidied away nicely.

 I used a funky piece of scrapbook paper to brighten up the top of it and used several coats of mod podge to protect it.  the picture above the telephone stand was a bargain i picked up in a charity shop last week for £2!


Tip Junkie handmade projects